Posts

Showing posts from September, 2022

Lindy's Gang Magical Simmer Powder and 3D Embossing Folders

Image
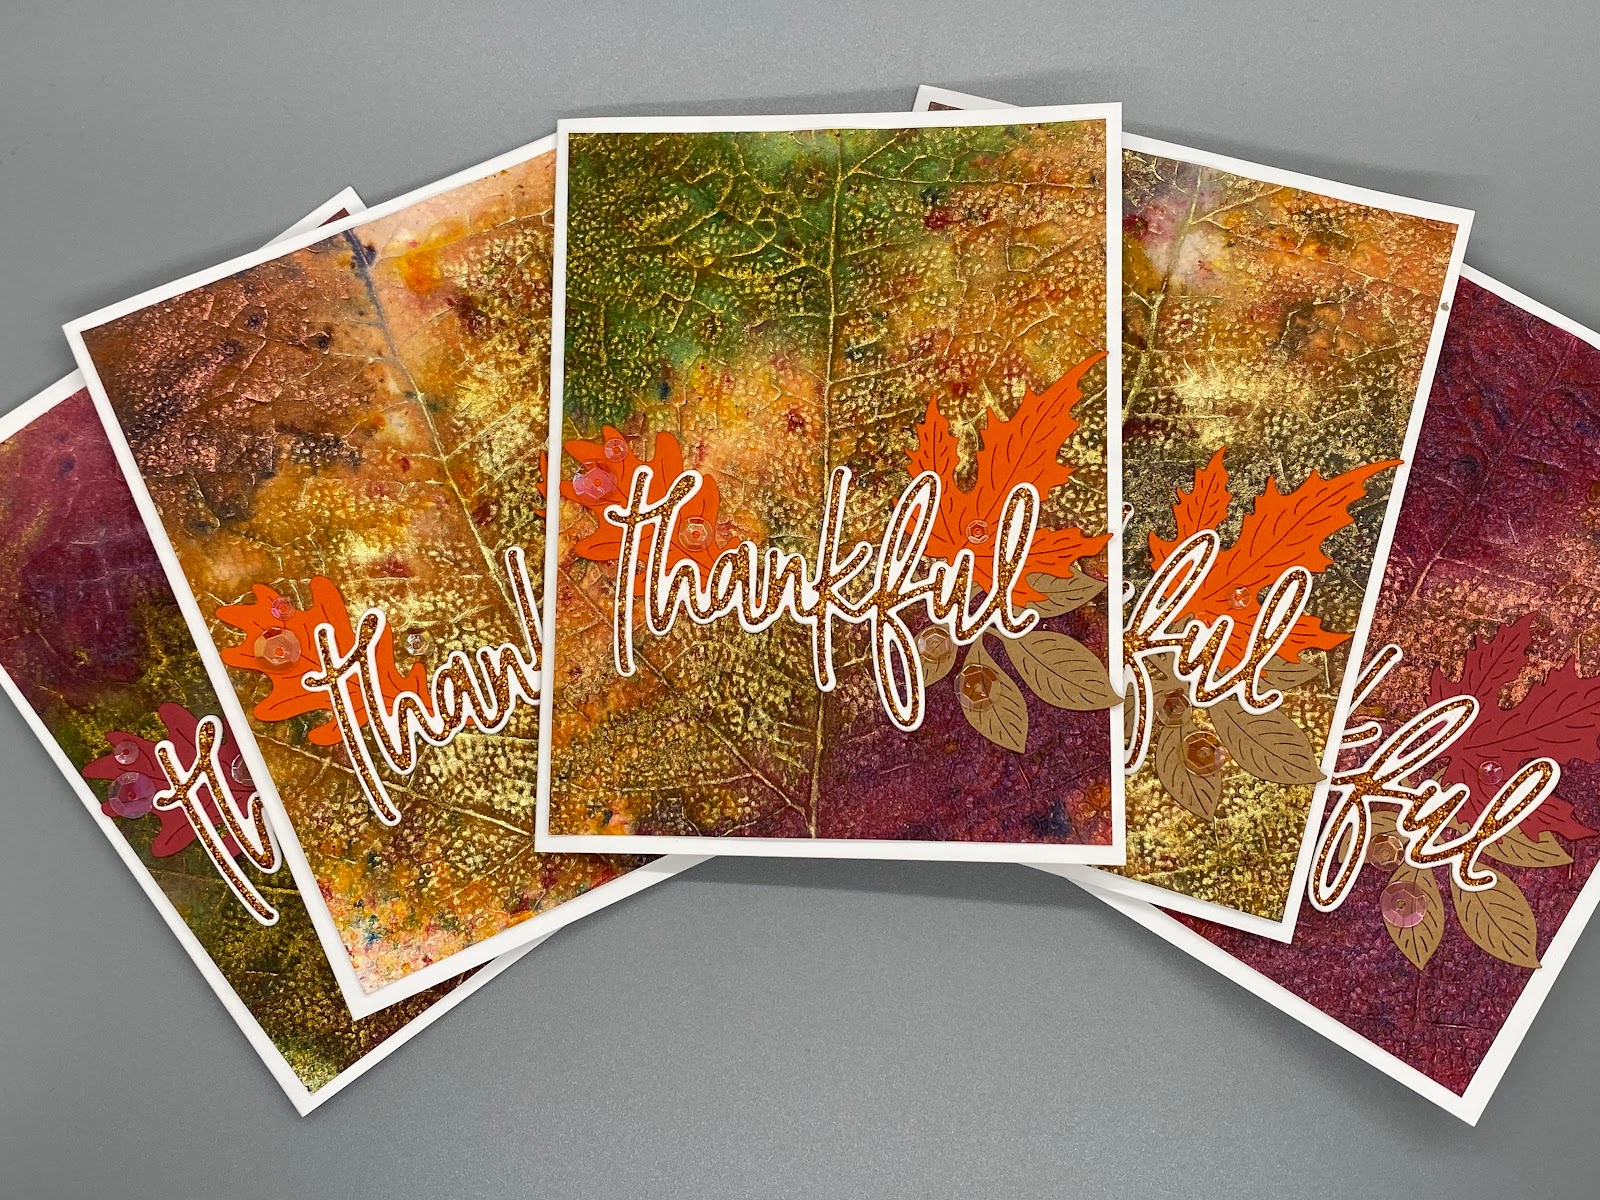
I recently purchased various sets of Lindy's Stamp Gang Magical Shimmer Powders and decided to test them out by making cards. To see the sets I've swatched, check out my page HERE for those swatches as well as other mica powders. For the cards in this post, I used Autumn Leaves and Enchanted Forest .   To create these cards, I cut down a sheet of Canson XL Watercolor Paper to sheets slightly larger than an A2 card front. I then embossed the paper using  Sizzix Textured Impression Leaf Vines 3D Embossing Folder with my Spellbinders Platinum 6 Die Cutting Machine and the Universal Plate System . The Universal Plate System is useful for creating the perfect amount of pressure when using various embossing folders. They have recommended shims on their website. I then added Lindy's Stamp Gang Magical Powders to the card using a dry paintbrush. These cards use Gnome Berry Bordeau, Sparkling Sunset, Toadstool Taupe, and Red Hot Poker Orange. For these cards, I used Autumn Map

Watercolor Flowers and Distress Oxide Ink Background

Image
I have been trying to find a creative way to use Hero Arts Antique Hero Map Bold Prints Stamp and I also wanted to practice my watercoloring, so I created these cards. These cards feature Altenew Watercolors and a Distress Oxide Ink background.  I first heat embossed the floral image from Hero Arts As Sweet As Honey Stamp Set with Gold Embossing Powder onto watercolor paper cut to 4" by 5.25". I then stamped the image onto Masking Paper from Altenew and fussy cut the image using Tim Holtz Haberdashery 6" Scissors . I placed this image onto the watercolor paper where I heat embossed the image. I made the mask slightly larger then the card front so I could wrap the excess around the edges so it would not lift up with the water. I was able to use the same mask for both cards.  To ensure the background stamp would stamp where I wanted it to on the background, I placed Hero Arts Antique Hero Arts Bold Print Stamp into my MISTI and stamped the image onto a piece of MIS

Watercolor Poinsettia with Nuvo Shimmer Powder

Image
I created these cards using a technique I featured not long ago which can be found with more detail HERE .  I first heat embossed Colorado Craft Company's   Big & Bold Slimline Poinsettia Stamp Set [left] and  Big & Bold Poinsettia Blessings Stamp Set [right] onto watercolor paper using Versamark Ink and Hero Arts Gold Embossing Powder . I then taped these panels down onto a hard surface with Spellbinders Best Ever Craft Tape . I used Catherine Wheel and Maroon Spark Nuvo Shimmer Powder to color the images. I then used the same shimmer powders to create a watercolor to spatter onto the background. For these cards, I used the same method as above but instead used Golden Sparkler and Ivory Willow Nuvo Shimmer Powder. I also added a bit of Green Parade Nuvo Shimmer Powder to the centers of the poinsettias. For the sentiments, I heat embossed sentiments using Christmas Day Embossing Powder from Brutus Monroe for the green and Christmas Eve Embossing Powder also from

Rawr-some Birthday Cards

Image
  I went out of my comfort zone and decided to practice my Copic Coloring. I created these cards using the All the Dots 6"x6" Petite Paper Pack from Lawn Fawn. I cut down each sheet of paper to a 4" by 4" square and then cut the square in half to create triangles. I then cut multiple sheets of Neenah Solar White 110# Cardstock to 4" by 5.25" sheets. Onto each sheet, I stamped a dinosaur from Whimsy Stamp's  Roar Stomp Chomp Stamp Set and  Roar A Saur Stamp Set with  Honey Bee Stamp's Intense Black Ink  as this ink is Copic friendly. I stamped a sentiment from Lawn Fawn's Rawrsome Stamp Set .  I'm not good at shading so I looked at the pictures on Whimsy Stamp's website to figure out the shading for each dinosaur. The colors for each dinosaur are listed below. Once I had each dinosaur colored, I glued the patterned paper onto the white card front and glued the entire card front onto an A2 card base made from Papertrey Ink Cardstock .

Christmas Time Shaped Cards

Image
To create these shaped cards, I used The Greetery's Hourglass Frame Die and Hourglass Frame Insert Die . This die set is a cute way to create scenes inside an hourglass. The Greetery has a collection of stamps and dies that coordinate with this die set but any scene making stamps or dies will work, especially ones that are made for snow globes. I used the die elements from The Greetery for some of these cards, but there are also coordinating stamps of the same elements. These can easily be made into shaker cards and while I did not make shaker cards this time, I plan to at a later date.   I first cut out the large hourglass shape from Hammermill White 100# Cardstock and used the following Distress Oxide Inks to ink blend the background of my cards. I used Ranger's Mini Blending Tool as I have one foam refill for each color of Distress Oxide Ink. First: Blueprint Sketch , Mermaid Lagoon , Tumbled Glass Second: Salty Ocean , Dusty Concord , Kitch Flamingo Third: Tumbled Glass