Embossed Vellum Cardfront with Copic Coloring

To create these cards, I first cut an A2 card front from Neenah Solar White Classic Crest 110# Cardstock and a sheet of vellum cut to 4.25" by 6" so that it was slightly taller than my A2 card front. I scored the vellum using a Scor-Pal at 5.5" and enforced the scoreline using a Teflon Bone Folder. I then stamped Simon Says Stamp's Hibiscus Blooms Stamp Set onto my white card front using Gina K Designs Obsidian Amalgam Ink using my MISTI.
Without moving the image in my MISTI, I stamped the sheet of vellum using Versamark Ink so that the stamp would align at the bottom of the vellum and heat embossed the image with Hero Arts Gold Embossing Powder. I also stamped and heat embossed a sentiment from Altenew's Bouquet of Love Stamp Set to the vellum. To heat emboss on vellum without warping, I used a heavy weight vellum and constantly moved my heat tool while embossing so that it wasn't on one area for more then about a second. I made sure to take the heat tool away from the vellum periodically. I repeated this process to create two cards.
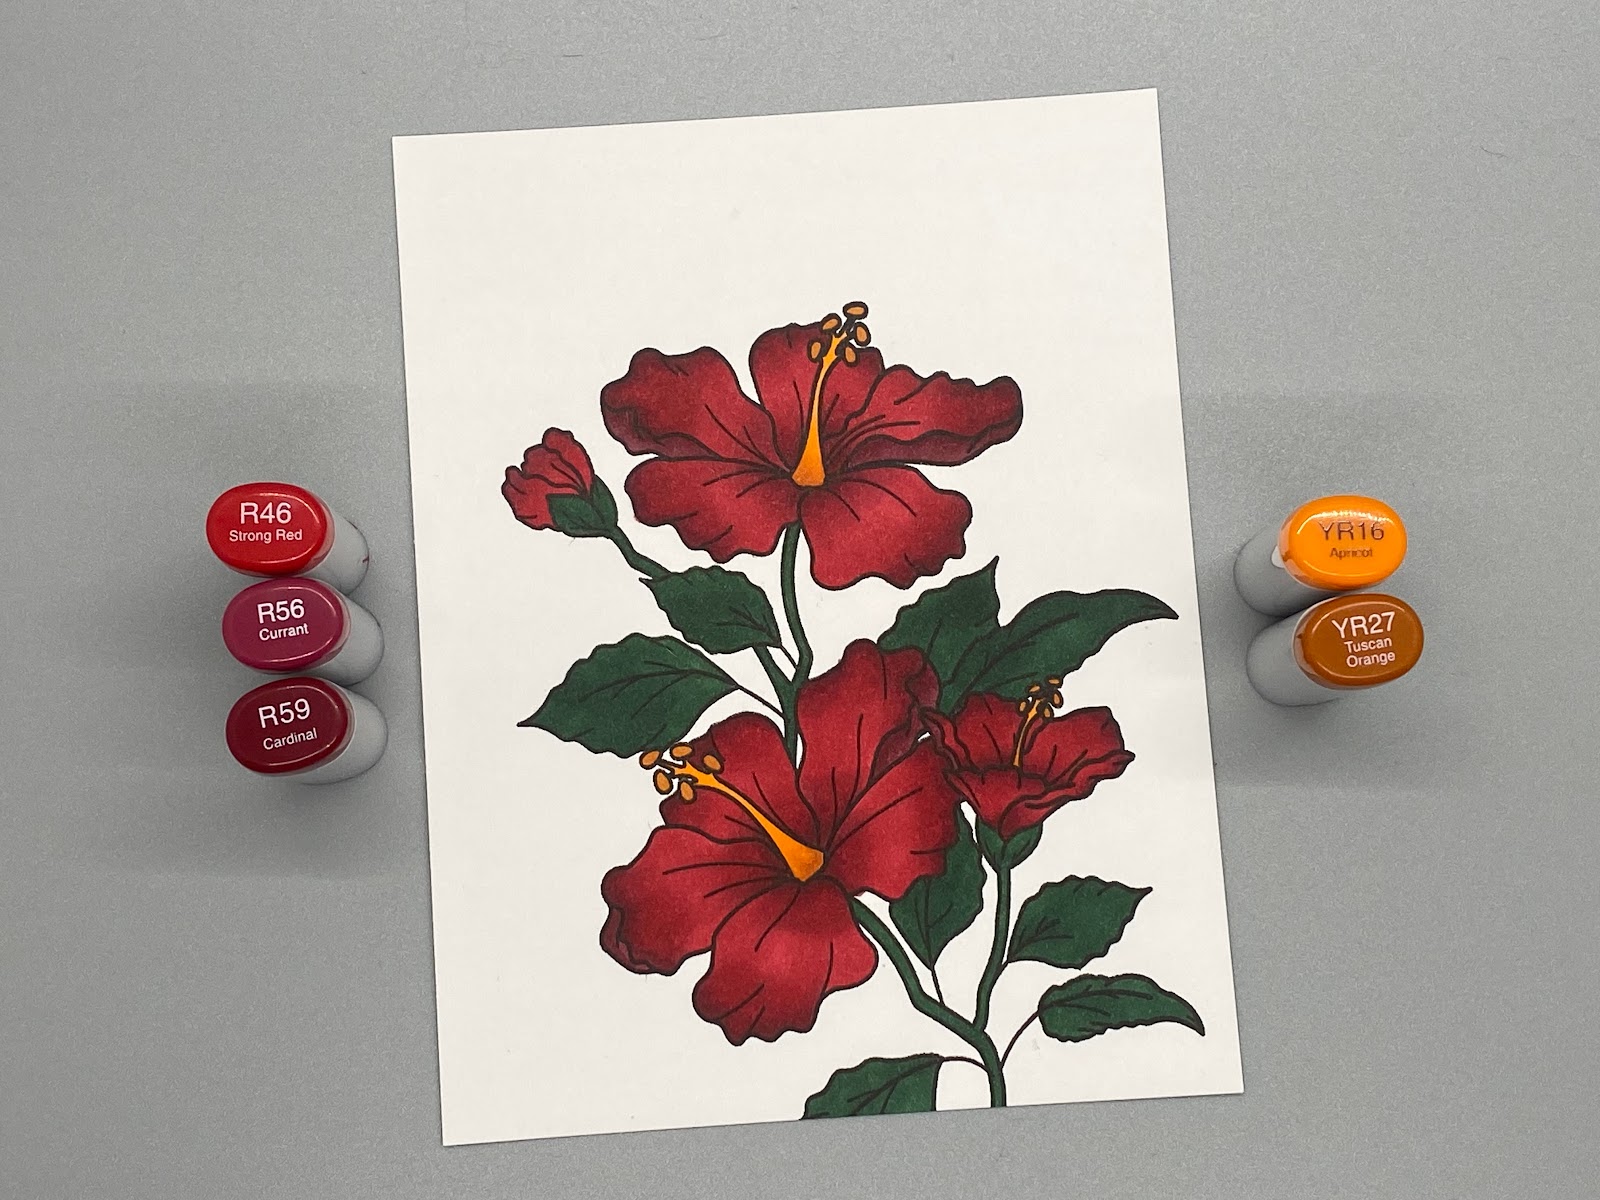
I colored both images using Copic Markers. For this card, I used R46, R56, and R59 for the petals; YR16 and YR27 for the flower centers; and G29 for the stems and leaves. I created a new page on my blog to post all of the copic coloring that I do. You can find this page by going to my homepage and clicking on the three lines at the top left corner and clicking on "Copic Coloring".

I used the same colors for the stem, leaves, and flower centers for my second card. For the petals, I used B93, B95, and B97. I colored the images by coloring each section with the lightest color first, then began shading with the middle color and deepened the shading using the darkest color. I went over my image again with the middle color and then blended everything together with the lightest color.

I trimmed down my card front so it was slightly smaller then an A2 card front. I cut another card front from colored cardstock - Papertrey Ink's Scarlet Jewel for the red floral image and My Favorite Thing's Blue Yonder for the blue floral image. I glued the top part of the vellum on the back side above the score line using Bearly Art Precision Craft Glue and adhered this to the colored card front to ensure no adhesive was showing. I then lined up my colored image with the vellum and glued it to my colored card front before attaching it to an A2 card front to compelete the card.

Simon Says Stamp Hibiscus Blooms Stamp Set [SSS]
Copic Marker R46 [SSS]
Copic Marker R56 [SSS]
Copic Marker R59 [SSS]
Copic Marker B93 [SSS]
Copic Marker B95 [SSS]
Copic Marker B97 [SSS]
Copic Marker G29 [SSS]
Copic Marker YR16 [SSS]
Copic Marker YR27 [SSS]
My Favorite Things Blue Yonder Cardstock [MFT]
Papertrey Ink Scarlet Jewel Cardstock [Papertrey Ink]
Neenah Classic Crest Solar White 110# Cardstock [SSS]
Bearly Art Precision Craft Glue [SSS]
Scor-Pal Mini Scoring Buddy [SSS]
Teflon Bone Folder [SSS]
Tsukineko Versamark Embossing Ink Pad [SSS]


Saw your Post on FB and had to come take a closer look. Gorgeous! TFS!!!
ReplyDeleteThank you!
Delete